If you run an ecommerce website, the ability to track customer interactions is vital. Specifically, one of those interactions you may want to track is when users add or remove an item from their shopping cart. In order to measure these events, you’ll need to set up Enhanced Ecommerce, covered in one of our previous blog posts in our Google Analytics 4 (GA4) series. Visit our GA4 Intro & Ecommerce and Purchase Setup guides to catch up.
With GA4, setting up tracking can be a little tricky. We’re here to walk you through it step-by-step. Now let’s get started with Add to Cart first.
How to Set Up Add to Cart Events in GA4
Step 1: Create the GA Add to Cart Event Tag
We’re going to be referencing several configurations from our last article covering the Purchase Event. We’ll be using the Items Variable to pull product data from the dataLayer. If you haven’t implemented the Purchase Event tag yet, you should set that up first since revenue data is even more vital.
Here’s how to create the Add to Cart event tag:
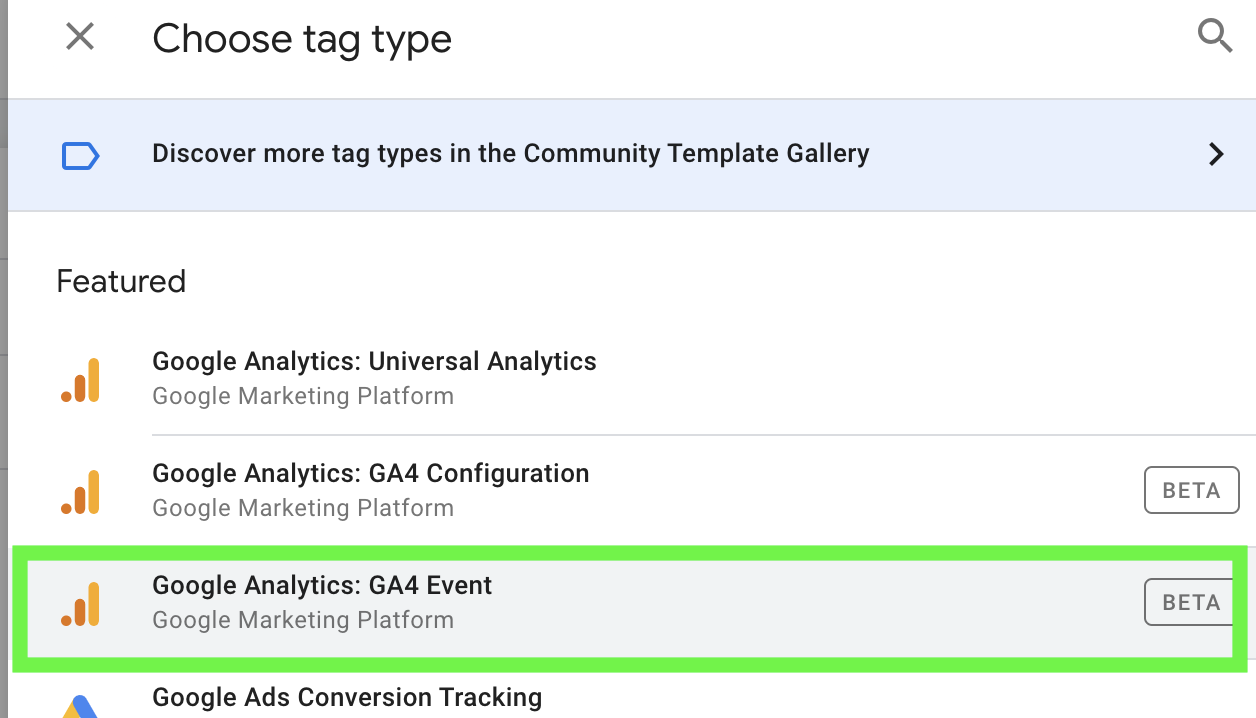
- First, create a New Tag from your Workspace.
- Select ‘Tag Configuration’ and choose ‘Google Analytics: GA4 Event’ as the Tag Type.
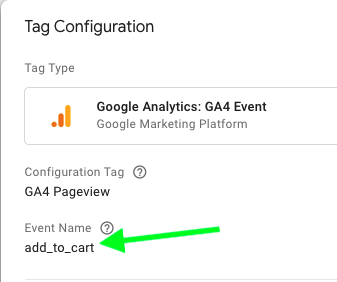
- In the Configuration Tag drop down setting, select your Configuration Tag.
- For Event Name, enter ‘add_to_cart’ into the Event Name field.
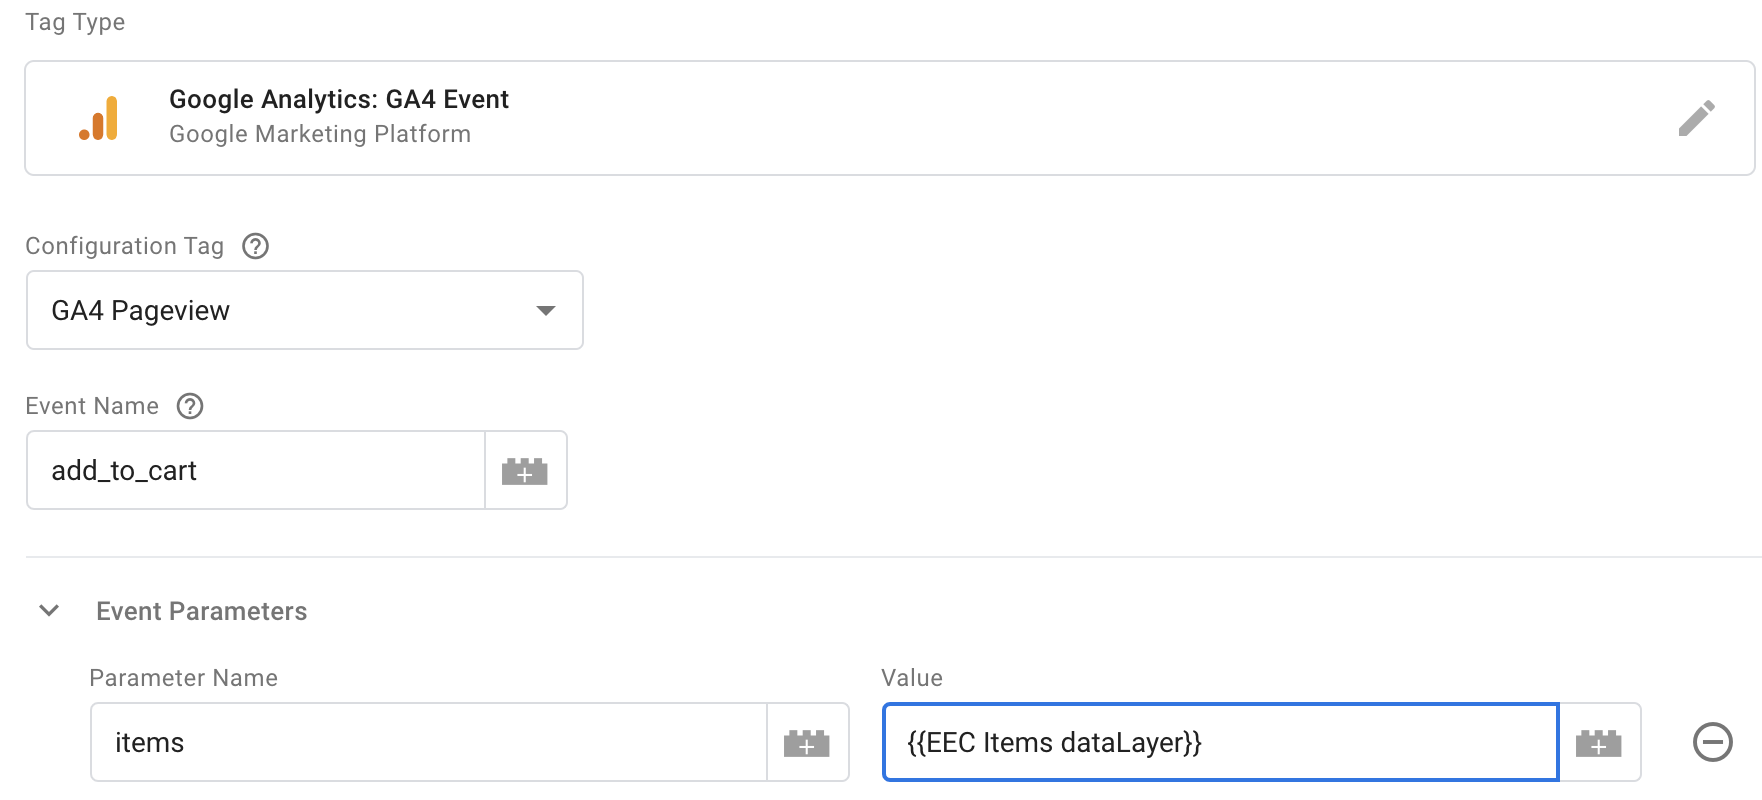
- Enter ‘items’ for our Event Parameter. For our Value, we’ll be using the items dataLayer variable that was explained in the previous post. If you implemented the Purchase Event using your own method, use your items variable as your value. This setup should look familiar as the items Parameter Name is the same as it is in the Purchase Event.
Let’s pause for a moment and unpack this. The items variable is reading from the product item array from your dataLayer. This ONLY works if your dataLayer is present on your product pages. This is important to check because not all websites include a dataLayer on product pages. It is common for websites to only include the dataLayer on the checkout pages. You can test this by using Google Tag Manager’s Preview mode and interacting with the Add to Cart functionality of your website.
You can also check Dev Tools to see if the dataLayer is populating. Review the ‘Data Layer’ tab within Preview mode to see what comes up. If nothing appears and you can confirm the dataLayer isn’t populating in Dev Tools, you would need to consult with your web developer about implementing the dataLayer on product pages to capture the data. The data can also be used for other GA4 Events like Product Impression, Product Position, Product Promotion, etc.
Keep in mind that implementing a dataLayer can be time consuming, and it could cause performance issues.
Step 2: Create the Add to Cart Trigger
Next, we’ll need to create a Trigger for when we want this tag to fire. The typical trigger for adding items to a cart is a button or a link click.
In most cases, the button or link text is ‘Add to Cart’, so in this example, we’ll use that as our condition for the Trigger.
- Create a new Trigger
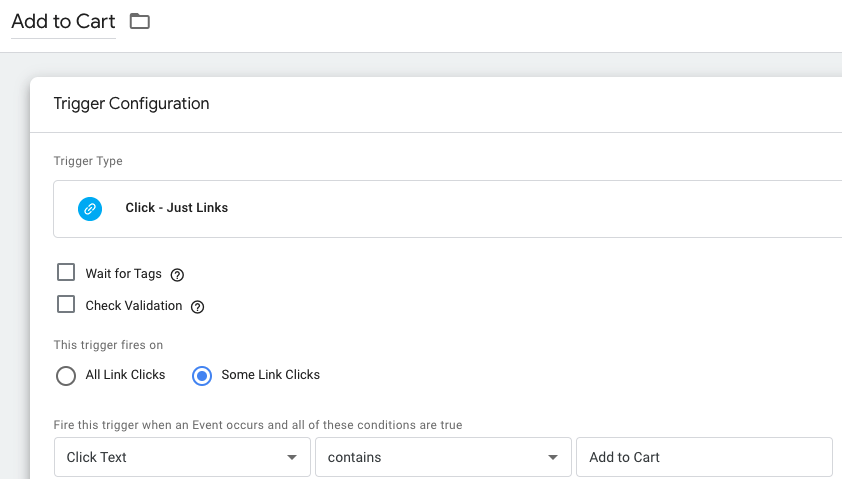
- Select ‘Click – Just Links’ as the Trigger Type
- Select ‘Some Link Clicks’
- Create a new Condition
- Variable: Click Text
- Matching Type: Contains
- Value: Add to Cart
As it stands now, this trigger will fire in every instance on the entire website a link is clicked with the text ‘Add to Cart’. You can be a little more specific with this trigger if you only want to track a subset of pages. For example, you can add a condition where Page Path includes the directory where your product pages live.
For products living in a flat URL structure, you’re going to have to get a little creative with your trigger and variable configurations. Look for a unique element on those pages that you can reference as a variable in your trigger. It could be a header tag or CSS selector of the template being used for those pages.
Let’s Test
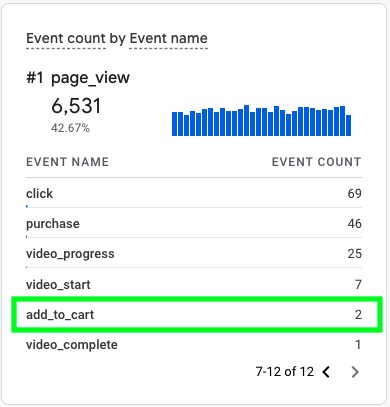
Fire up GTM Preview Mode, interact with the Add to Cart button on your website, and check if the Tag fires. After a successful hit is seen in GTM Preview Mode, head over to your Google Analytics 4 account. GA4’s Realtime data should display the Event hit within a couple of minutes. Look for the clock icon in the top left corner of your GA4 dashboard for Realtime. Remember, it will take several hours for the hit to process in the other GA4 reports.
Setting Up Remove From Cart Events in GA4
Step 1: Create the Tag
We’re going to follow the similar steps outlined above for Add to Cart.
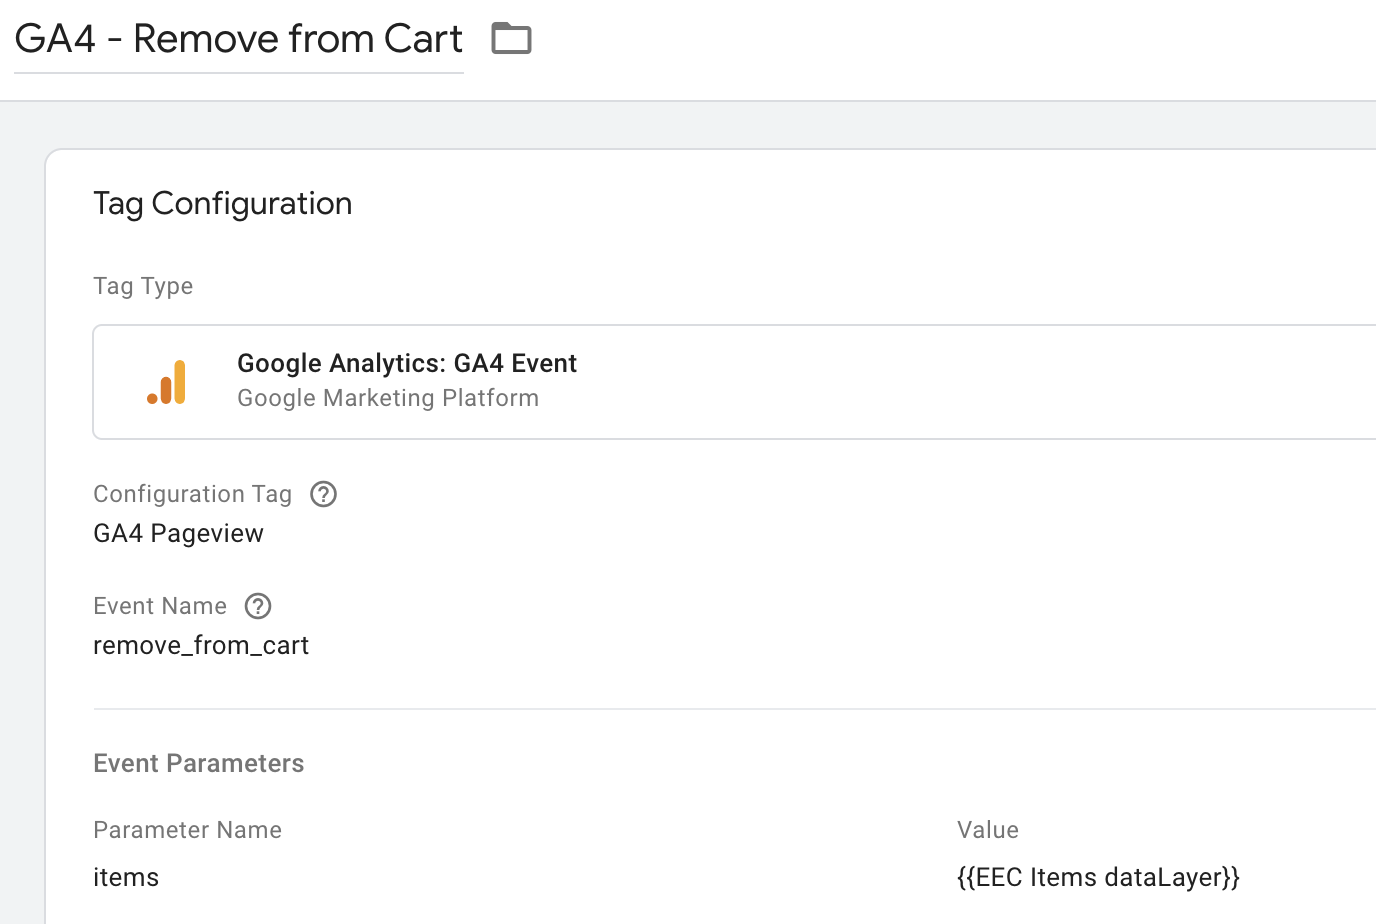
- Create a New Tag, select Tag Configuration and choose the GA4 Event Tag Type.
- Select your Configuration Tag
- For Event Name, enter “remove_from_cart”
- For the Event Parameter, we’ll be using the same items parameter and value we used for Add to Cart.
Pro Tip – Use the Copy feature from GTM to quickly duplicate similar Tags.
Expert Tip – Consolidate the Tags into one for both Events by using Lookup Tables in the Event Name field. Avoid redundancies when you can!
Step 2: Create the Remove from Cart Trigger
For most ecommerce sites, the Remove from Cart functionality is located on your Shopping Cart page via a link or an ‘X’ button.
In the example below, the Remove from Cart functionality is a simple text link.
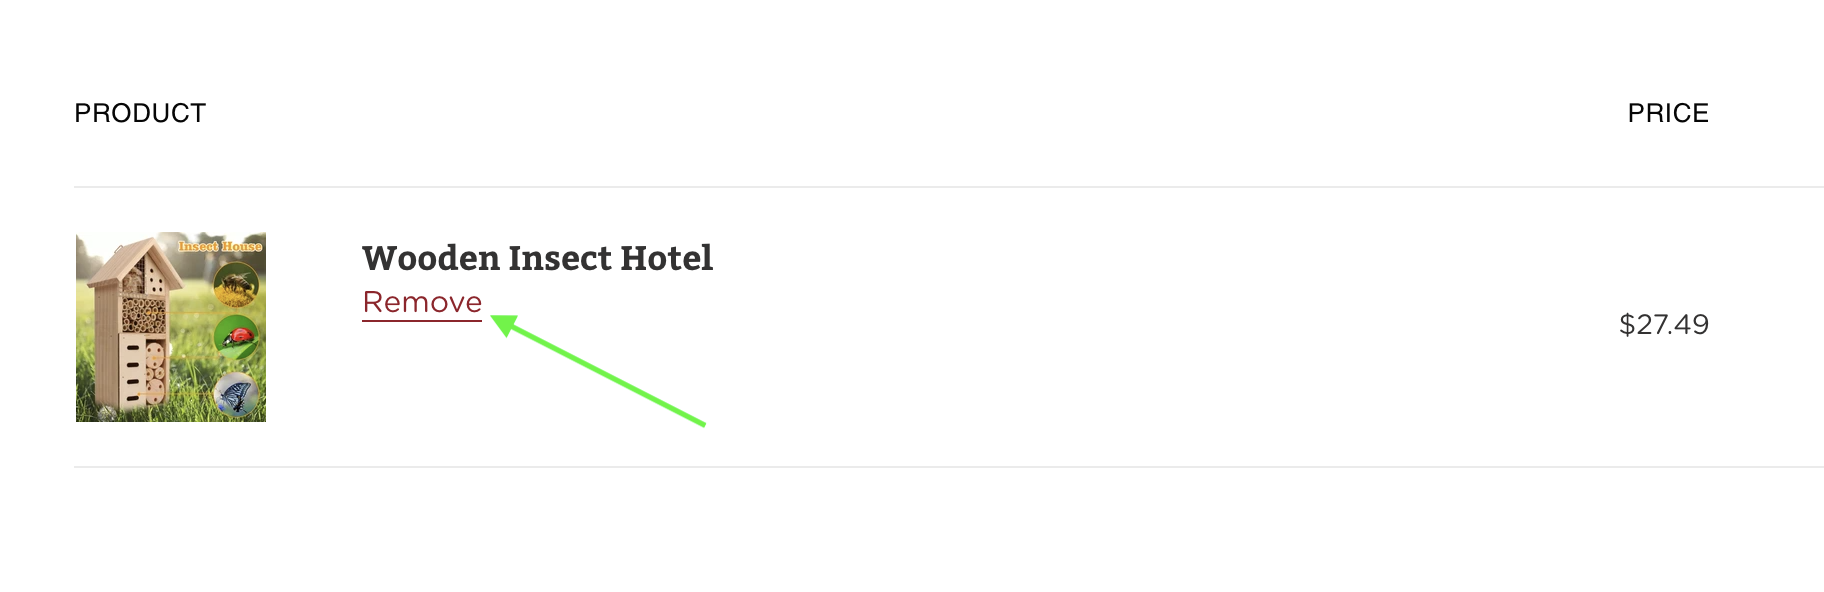
For this Trigger, we’ll be able to follow what we did for the Add to Cart Trigger but change the Click to Text Variable value to ‘Remove’.
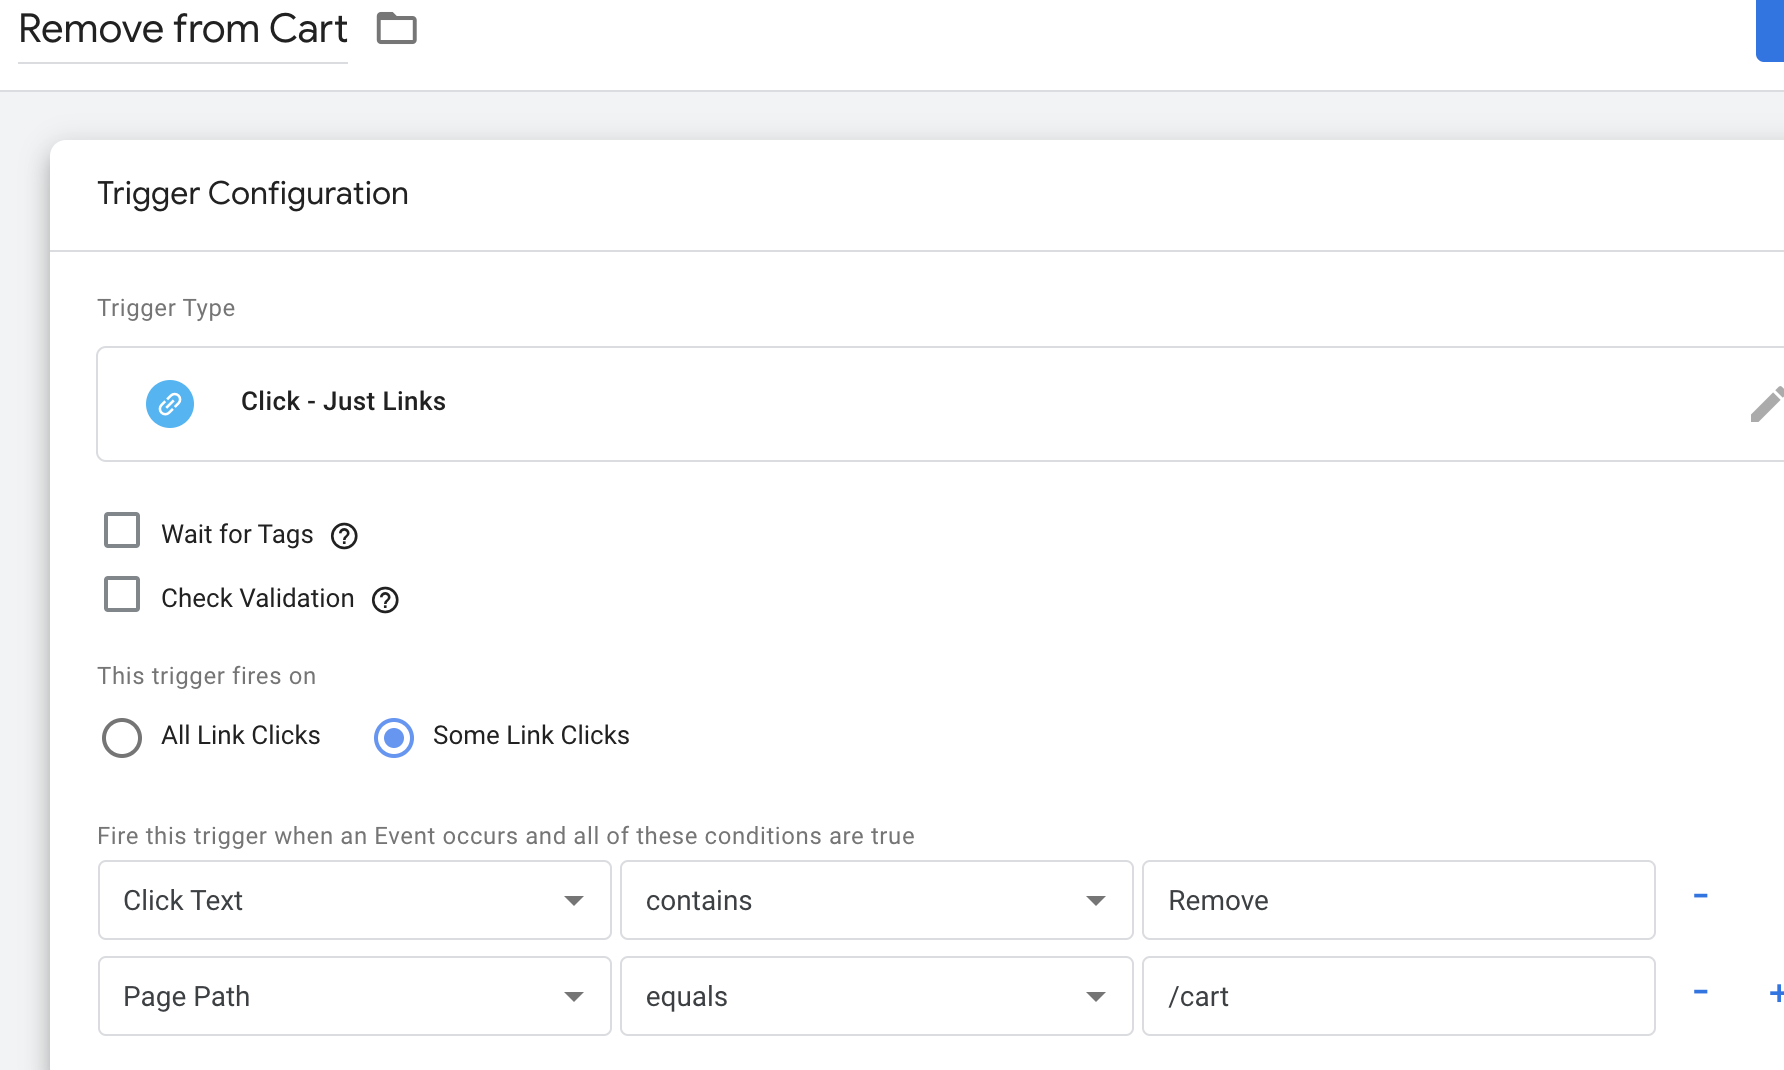
- Create a new Trigger
- Select ‘Click – Just Links’ as the Trigger Type
- Select ‘Some Link Clicks’
- Create a new Condition
- Variable: Click Text
- Matching Type: Contains
- Value: Remove
To ensure that we’re only capturing this event for users removing products from the Shopping Cart, add another condition to fire only on the shopping cart page. Don’t forget to test this in GTM Preview Mode and GA4 Realtime.
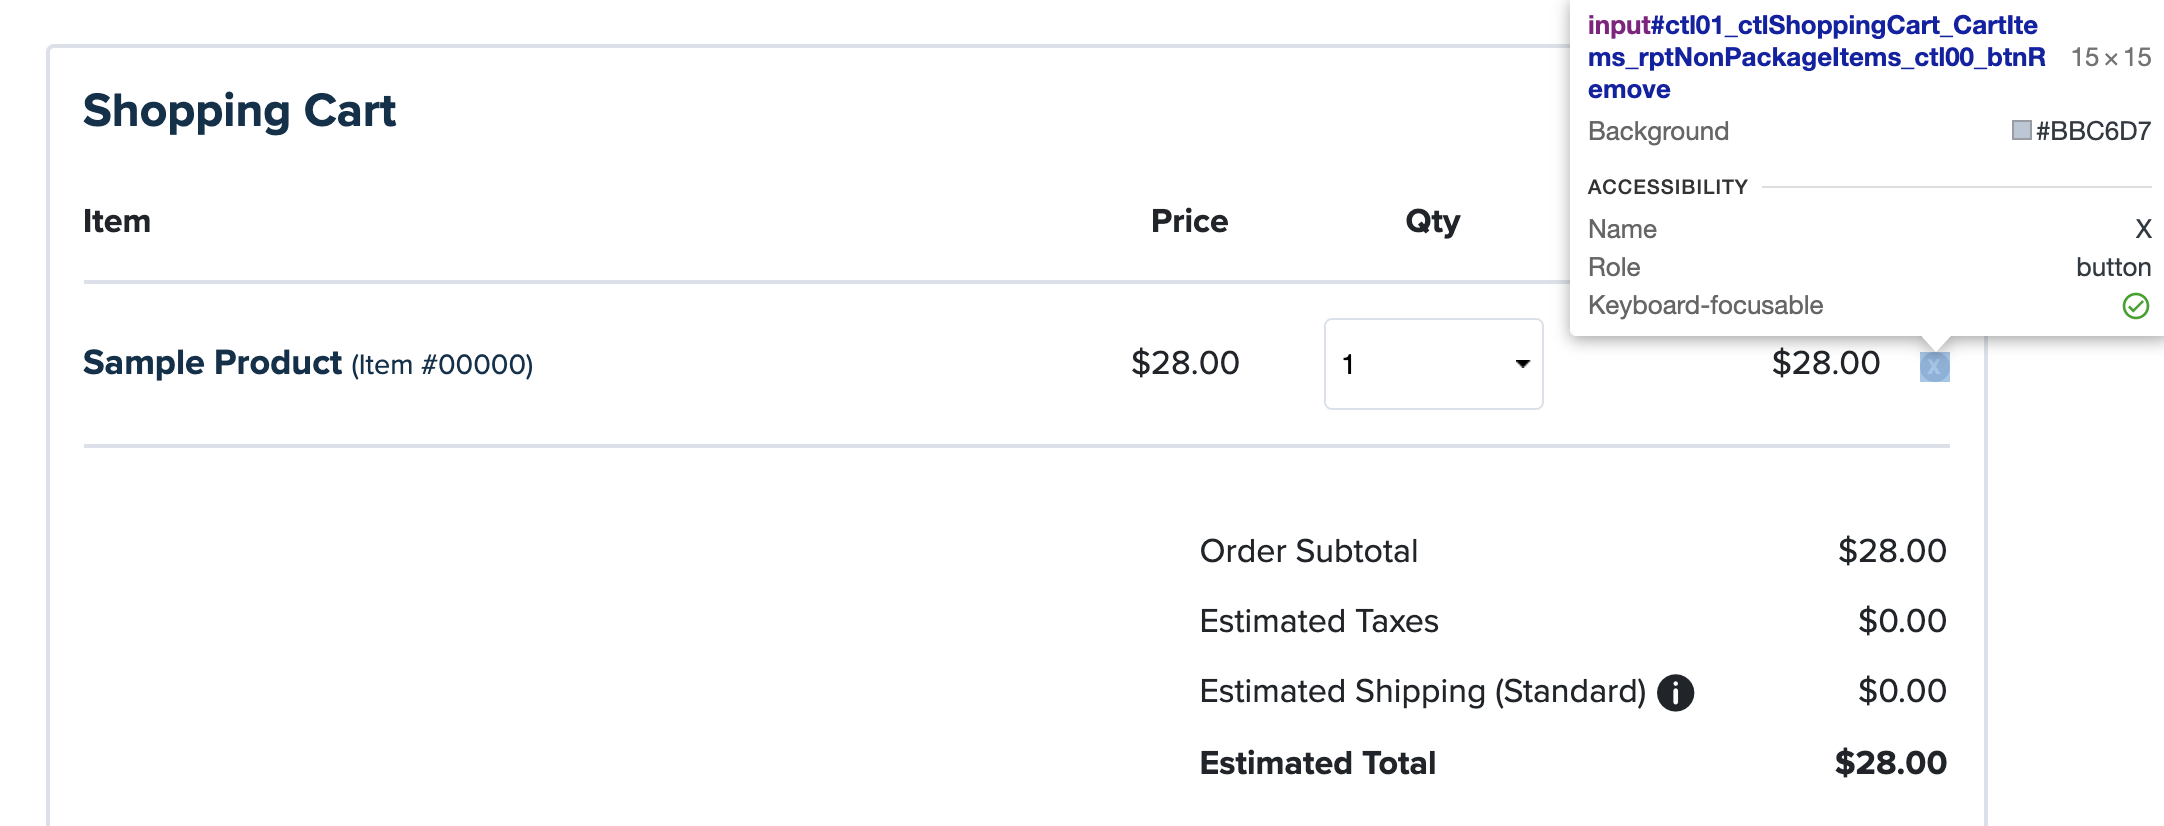
Not all Shopping Carts are this easy. Some Shopping Carts have an ‘X’ button that requires a different variable. In the screenshot below, we aren’t able to use the Click Text Variable. We would need to create a new DOM Event variable to reference the CSS Selector. For Shopping Carts that have both a link and an X, you’ll have to get creative with your trigger(s) to ensure you’re capturing both functionalities!
Don’t forget to publish your GTM Container to get these Events live after your tests prove successful.
That’s all for now, but stay tuned – we’re just peeling the surface of GA4. Check in again as we’ll be sharing more GA4 enhancements!
Need additional support setting up GA4? Want to explore ways to track user interactions and measure ecommerce data? Reach out to WTM. We are a full-service digital marketing agency that provides Technical SEO and Analytics services, including Google Tag Manager and GA4 implementation.