In this day in age where consistency in local citations is paramount for local SEO, having a business with multiple locations creates a problem when trying to main this consistency. A business with multiple locations creates a problem when it comes to local citations. Creating, editing, and maintaining them all can be a pain as you try to gain control of all your company’s online information. Facebook can be one of these pain points. Thanks to auto-generated information, check-ins from users, and misspellings, a business can have many pages not officially associated with them, or ‘rogue pages’. For companies facing the issue of having a variety of rogue pages, or looking for an easier way to maintain multiple locations, Facebook Locations is an easy solution.
Facebook Locations utilizes a parent-child organizational structure for company pages. They allow the owner to have a single branded page and sub-pages with all the various locations and their specific information. Think of it as a spoke and wheel where the brand functions as the center of all the locations.
Why Switch to Facebook Locations
There are many reasons to switch your company page to a Facebook Locations set-up. You may be frustrated with the current set-up or looking for a solution to several issues.
Multiple Locations: This is the obvious benefit. If you have 3 or more locations, then setting up this is well worth your time.
Aggregation of Content: If having one place to post content is important to your company this solution is right for you. As page owner, you’ll be able to post across all locations without
Manage Rogue Pages: Having official location pages for your brand may help cut down on the number of rogue pages created from user check-ins. These verified pages are easier for users to see and hopefully make it a simpler check-in process through their preference.
How to Switch to Facebook Locations
Apply for Locations
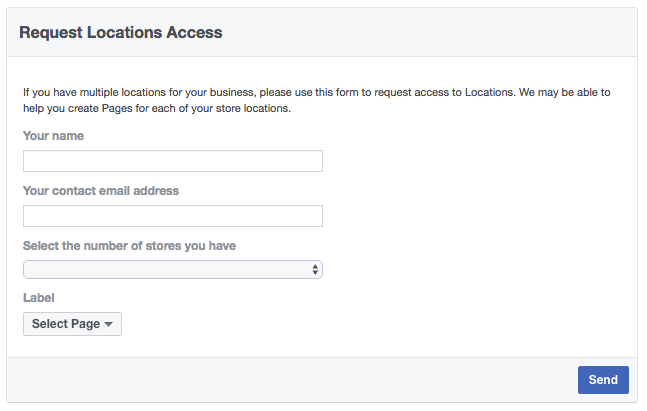
The first step to start on the process of adding locations is to apply through Facebook to gain access to locations. This process is simple and you should be approved within a couple days. To do this simply navigate to the Request Location Access section of desktop help and fill out the correct information. Make sure you double check that you’ve selected the correct page as it will be your main brand page. This will take a couple days to process, but you’ll receive and email when it has been approved. If you need to check on the status of this at any point, you can find the latest from Facebook in the Page Support Inbox section in your page’s settings.
NOTE: If you already have location pages that are not connected to your main page, do not select these. Select your main page or headquarters page as it will be the center of this spoke and wheel concept. We will deal with transitioning the rest later.
Setting up Locations
If the main page you were using was a local business or setup as another type of page, you may have to transition it into a brand page. Facebook will ask you about this before it makes the transition. The new brand or main page cannot have an address associated with it and thus specifics associated with this address (ratings, reviews, etc.) will be moved to the corresponding location page.
After approval, there are several options you can choose from when setting up your locations: manual setup, importing, and using another page.
Manual Setup
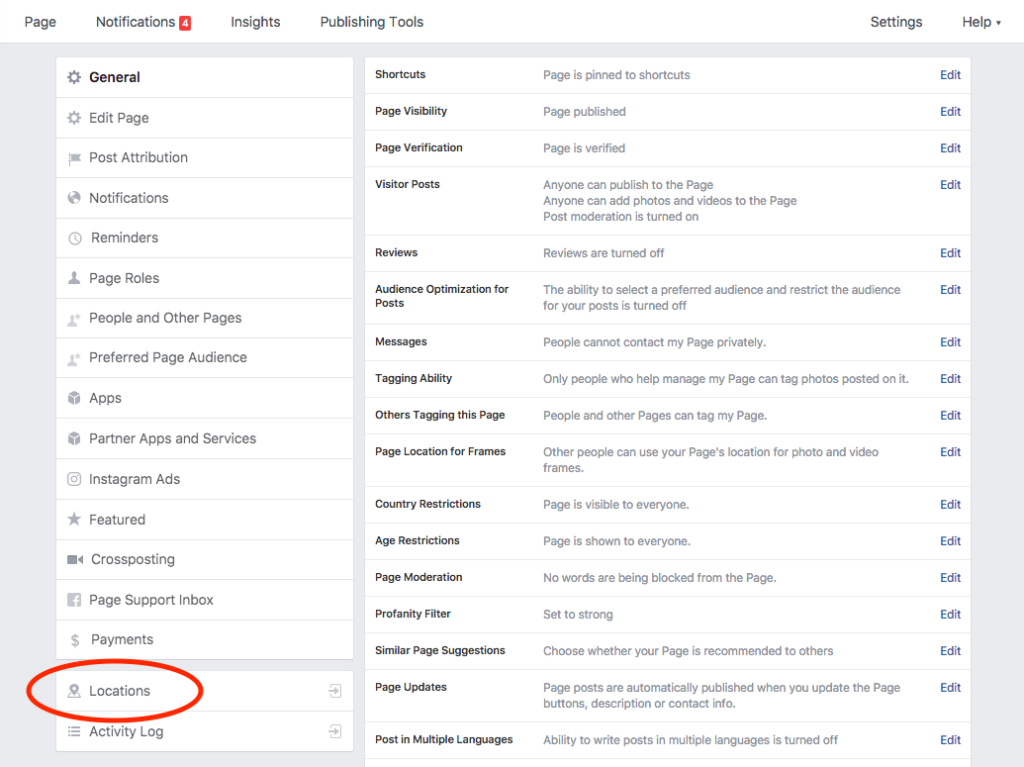
This setting is for first time location users who have no locations listed. To begin, navigate to the Locations area of your brands page which can be found at the bottom of the left-hand menu under settings.
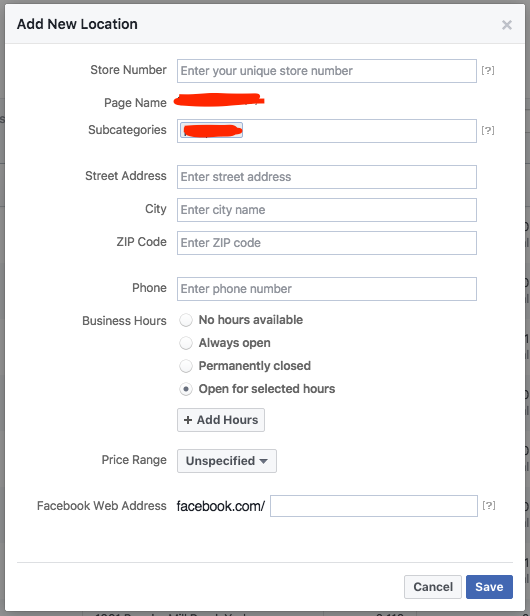
Select Create a new Page and begin filling out the correct information to the best of your ability. There are several things to note and pay attention to:
- Store Number: This must be unique to every location and allow both you and Facebook to easily identify locations without having to use the names. It must be a positive whole number with fewer than 10 digits.
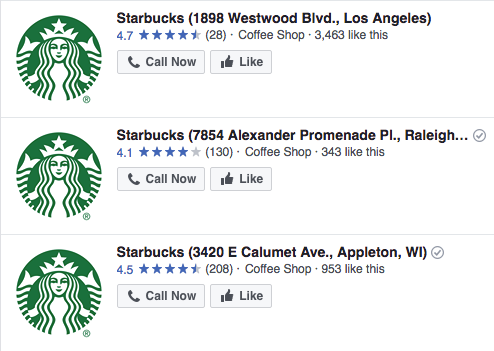
- Page Name: This will always be the same as the main page’s name, you’ll see a difference on the locations page as well as in search where it will include the city or street name in parenthesis.
- Facebook Web Address: This will also help you specify which location is which and allows you to create a custom URL so people can easily access this location. Make it easy for users to find you and keep thing simple with your brand name and perhaps the city or street.
Importing
If you already have a single location in your profile, another way to set up locations is to use the spreadsheet import method. This method is only accessible in Facebook Business Manager, which means your brand must be imported and set-up in there for this to work.
- Navigate to the settings area of your page in Business Manager and select Locations.
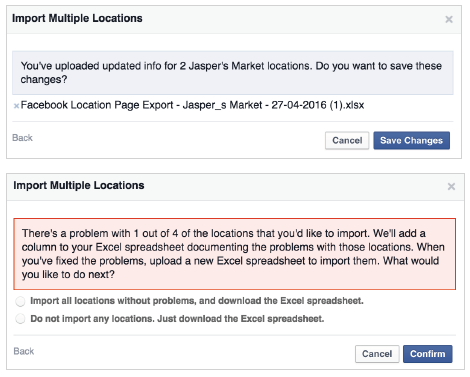
- Select Import Multiple Locations
- Select Download All Locations
- You’ll now have a spreadsheet in which to add the new locations. If you edit already existing rows, the revisions will be reflected once you re-upload the sheet.
- To upload your changes, simply navigate to the first step and follow the instructions. You’ll see a confirmation screen if everything imports error free.
Using Another Page
This process works if you already have separate pages for your locations and wish to combine them into a more manageable system. To begin, navigate to the Locations area which can be found in your main page settings.
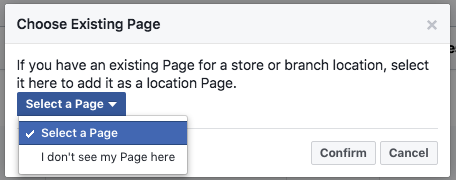
- Click the Add a Location drop-down menu and select, Choose Existing Page.
- Select the appropriate page from the drop-down menu.
- If you do not see the correct page, select I don’t see my Page here and search for the specific location.
- Fix any outdated information and you’re done!
Using Facebook Locations
All your locations can be found in the Locations area of the main page settings. You can edit the information for these pages directly by using the button on the right of the table. Additionally, information can be edited directly on each location page as you normally would.
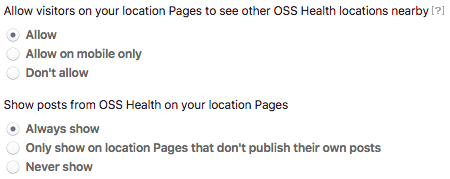
Another thing to note is the two options at the bottom of the table. Allowing visitors to see other locations nearby is always a good choice but the second question is the most relevant to content. If you’d like the location pages to show the same posts, photos, and links shared on the main page, you’ll want to select Always show. If you’d like to update each location on its own, then you’ll want to select the last option of Never show. The middle option, Only show on location Pages that don’t publish their own posts, will show the same posts as the main page until something is changed or added to the location page. Then it will not show any of the posts and will switch to never showing main page posts.
Facebook Location Features to Note
Using Facebook locations allows you to control several helpful settings for each location. In the settings section of each location you’ll find the following helpful choices:
- Reviews: You can turn on and off reviews for each location manually with this setting.
- Messages: If you’d rather not monitor the messages for each location, this setting can be changed so users are not allowed to send messages.
- Page Roles: Perhaps each store would like to post their own information and events to their location page. Use this feature to assign manager or editor positions for specific locations.
With a little time and effort, you’ll be able to manage your brand quickly and succinctly. Setting up Facebook Locations can give you an easier way to control the information of your company on one of the largest social media platforms. Good luck and happy migrating!